
Your Cart Total
{{price(cart.total || cart.subtotal_with_discount)}}
Add {{price(remainder)}} to qualify for free shipping*
You qualify for free shipping!*
Some items in your cart do not
qualify for free shipping.
Explore podcasts, videos, blogs, and webinars for inspiration and expert advice. Our extensive library is for everyone from beginners looking for a step-by-step guide through their first project or seasoned pros seeking fresh ideas and inspiration. We cover the topics you care about like technical tips and FAQs, interviews with industry stand-outs, and equipment comparisons and tours. Dive into our library and expand your knowledge today!
Go Back To ResourcesPut simply, sublimation is a fancy word for a simple chemical process. During the sublimation process, a specially formulated ink is heated into a gas, then bonded into the surface of a sublimation compatible material as it cools, resulting in a vibrant, durable, and professional-looking print.
Overall, sublimation prints offer a great option for printing a multitude of colors, including skin tones, on both hard and soft substrates. The blank, or substrate, must have a special polyester coating or polyester content for the process to work, and be a white or light colored item.
The process is easy; print your transfer, apply heat and pressure, and your transfer is complete! To get started, you’ll need a sublimation printer, a sublimation blank, and a way to add heat pressure, like a heat press, mug press, or convection oven.
You’ll print your design onto a special sublimation paper using a sublimation ink. Once your image is printed, you tape your print to your blank item, and add the heat and pressure to initiate the chemical process of sublimation! Check out our buyer’s guide to learn how to get started with sublimation printing.
A sublimation system comes in a variety of configurations depending on the decorator’s product offerings and production volume. There are five main components to a typical sublimation system.
Savvy business owners have long enjoyed the versatility of dye sublimation. It’s not unusual for sublimation users to make a variety of special products to satisfy an individual customer’s diverse needs. Whether it provides interior signage, full color plaques or promotional goods, a single vector logo delivered to a digital decorator can yield hundreds of individually customized, sublimation products. Furthermore, digital decorators from other industries like engraving and embroidery are finding that they can target entire new market segments merely by adding a sublimation system.
When you’re first getting started, the sublimation process can present some unique learning curves. Should you ever have questions, we urge you to contact one of our sublimation professionals. Johnson Plastics Plus has numerous support options and sublimation resources, including videos, blogs and more. We also offer numerous educational opportunities including trade show seminars, webinars, technical articles in trade magazines and our open house/hands-on events at various locations around the country. We look forward to answering any questions you might have about dynamic sublimation technology and our many available solutions. Check out our buyer’s guide to learn how to get started with sublimation printing.
Adding sublimation and other full-color printing technologies can be an exciting and profitable way to expand your business! There are many options available to you...and sorting through those options can be a daunting task. That’s where JPPlus can help!
Read our blog post here about how to choose the best sublimation printer to start your creative journey! Explore our other blog posts and discover the ins and outs of sublimation and how to get started.
Whether you're choosing sublimation, toner heat transfer, direct-to-film, direct-to-garment or UV-LED printing to start your full-color printing journey, JPPlus has the equipment, supplies, and technical expertise to make sure you're getting the most from your purchase!
If you aren't sure which equipment is right for you, fill out this form here and an equipment sales representative will be in touch to help you with any questions.
Whether you’re just starting out with a sublimation business or continuing to grow, it can be confusing to choose what would be the best sublimation printer for your business. Before you select a printer for your business, you’ll want to decide what features are the most important to you. Epson offers SureColor printers for every stage that your business is in, let’s look at what Epson sublimation printers are available.
| Printer | Paper Type | Largest Paper Size | # of Ink Channels | Best Suited For |
|---|---|---|---|---|
| F170 | Sheet | 8.5" x 14" | 4 | Hobby/small business |
| F570 Pro | Sheet/Roll | 24" inch roll | 4 | Medium size business |
| F6470 | Roll | 44" inch roll | 4 | Large scale production/business |
| F6470H | Roll | 44" inch roll | 6 | Large scale production/business |
Epson SureColor F170: The smallest of the Epson sublimation printers, this machine prints letter or legal-size sheets. You can use it for smaller papers like mug size, or small custom size paper. It utilizes ink tanks; you can quickly see your ink levels. You can print directly from any design program without any additional software needed. For example, you could design in CorelDraw or Silhouette Studio and print directly to the Epson SureColor F170.
Epson SureColor F570 Pro: This printer works with either sheet paper or rolls of paper, giving you flexibility and efficiency with your printing. Instead of printing to 11” x 17” sheet, you can opt for a 17” or 24” roll and maximize your paper usage. Epson also includes a RIP software called Epson Edge print to assist you with layout options and color management. It’s a great step up for small businesses or can be a workhorse for larger shops.
Epson SureColor F6470: For the shop that needs to prioritize product, this 44” roll printer offers quick, high-resolution printing. Utilizing the Epson Edge RIP software for layout and consistent color management. A take-up reel allows you to print longer jobs and maximize your printer’s productivity.
Epson SureColor F6470H: The same great printer as the F6470, but with six color channels and several color configurations available, for the shop that wants to offer fluorescents, or a wider color gamut for stunning photography panels, this printer is what you are looking for.
For more information on which printer would be the best for your business, fill out this form and an equipment sales representative will be in contact.
If you are experiencing a paper jam on an Epson SureColor F570, there are some general steps you can take to clear the jam. If you are unable to clear the jam, reach out for additional technical support.
General steps for clearing paper jams on the Epson SureColor F570:
For roll paper jams:
There can be several reasons you may not be getting proper color transfers when sublimating. Here’s a brief checklist of what to look for to help correct the issue:
Because your monitor and printer use different technologies to represent colors, your printed colors can’t exactly match the colors you see on your monitor screen. Set up swatches labeled with the color that corresponds to them. Print a transfer and sublimate it onto the respective substrate. Place this color chart next to your work station & refer to that instead of what you see on the screen.
JPPlus recommends using specialized sublimation paper during the sublimation process. These papers have a coating that helps promote proper image reproduction during the sublimation process. Using uncoated paper can lead to disappointing image results.
Sublimation paper is a specialized paper used in the sublimation printing process, designed to hold and release ink when exposed to heat. Unlike regular printer paper, sublimation paper is coated with a special layer that is typically composed of silica and a binder. This coating absorbs the sublimation ink and allows it to be released when heated. This process enables vibrant, long-lasting prints to be transferred to polyester coated materials.
What makes sublimation paper an important part of the sublimation process:
Sublimation Paper Types:
Sublimation paper comes in various types, primarily differentiated by their weight, measured in grams per square meter (GSM). Common types include standard, high-release, hybrid sublimation papers, and tacky papers each designed for different substrates and printing needs.
Paper Size Options:
Sublimation paper comes in many options. There are sheets available in a wide variety of sizes and rolls of sublimation paper available in varying widths and lengths. Always check to see if your printer has specific recommendations about what sublimation paper sizes are compatible.
Learn how to easily sublimate on tumblers and mugs with shrink wraps with our step-by-step guide. This method is a great tool for sublimation on mugs without a mug press or sublimation tumblers that are too large for your mug press or oddly shaped.
Whether you’re sublimating a small image or a full-wrap sublimation design, the key to vibrant, crisp transfers is applying consistent pressure and heat. Start by securing your printed sublimation transfer to the tumbler or mug using heat-resistant tape. Then, apply a shrink wrap sleeve and use a heat gun to tighten it evenly around the surface to eliminate air pockets and prevent ghosting. Once cool, simply peel off the brittle shrink wrap and transfer paper to reveal your finished product.
View our shrink wrap sleeve guide here to know which wraps are compatible with our drinkware.
Browning (or scorching) of a sublimation print out happens when the print out is too hot for too long and the paper will turn brown. This can result in blurred or incomplete image transfers.
While it might sound counterintuitive, turning the temperature of your heat press UP and reducing press time may help eliminate the issue.
There are several things you can check if your transfers are coming out blurry when pressing an item:
Items for sublimation need to have a polyester coating in order to accept sublimation inks. Uncoated items will not properly accept the inks and the images will not transfer. You can, however, add your own sublimation coating by using a product like Subli Glaze™. Subli Glaze™ is the only do-it-yourself sublimation coating solution that is designed to enable sublimation decoration on a whole range of surfaces such as ceramic, wood, glass, plastic, metal or stone. Coat substrates quickly and easily, making almost any surface sublimation ready!
JPPlus has a full line of sublimation blanks specially designed to accept sublimation inks.
If you’re getting streaks across your image from your sublimation printer, there are a few things you can check to help resolve the issue:
If your printout appears really light on paper...don’t worry! This is completely normal. Sublimation ink naturally looks very subdued and washed out before you transfer the image. After you transfer the image to your sublimation substrate, the colors should appear as they did in your initial design.
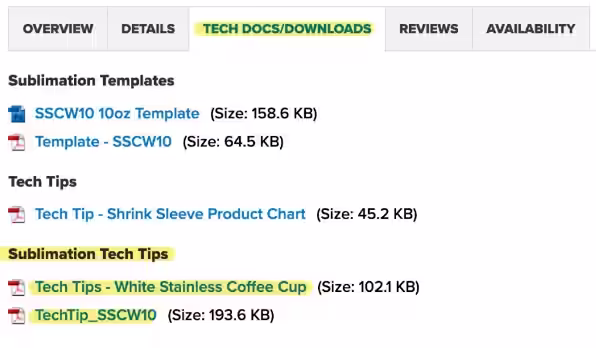
There are free downloadable Tech Tips for sublimation items available through jpplus.com. Those can be found under the “Tech Docs and Downloads” tab at the bottom of each product page.
While time, temperature and pressure vary from substrate to substrate, there are some general guidelines that can send you in the right direction.
One of the most common causes of “blow outs” (spots where the ink did not absorb into the substrate) is moisture. During the pressing process, moisture can form into tiny steam pockets that “blow out” the ink from the substrate...hence the term.
Typically, a small amount of moisture can be absorbed into the substrate without issue. However, harder substrates, such as aluminum and ceramic, can’t absorb that moisture.
The good news is there are a few steps you can take to remove as much moisture as possible!
The first steps of sublimation often involve the same tools used with other technologies like engraving, screen printing and embroidery. It is only after the final image is printed to paper when sublimation sets itself apart from all other technologies.
Here’s the step-by-step process required to produce a sublimated product:
If you’re not sure which file format to use for your design, print, or web project, our resource guide is here to help! Below we break down the most common file types such as PNG, JPEG, SVG, PDF, and more. Whether you’re working with vector graphics, high-resolution photos, or laser and print-ready files, this guide will help you understand file extensions, compression, transparency, scalability, and ideal use cases for each file type.
You will always want to verify what file types are compatible with the software and technology you use, as some equipment needs specific file types, while others can handle multiple different types of files.
The main categories of heat presses are clamshell, swing-away, and specialty heat presses. Each type offers unique features and is suited for different applications and personal preferences.
Let's take a more detailed look:
When choosing a heat press for sublimation, consider the type of projects you'll be doing, the size of the items, and your budget. Factors like temperature accuracy, pressure adjustment, and ease of use are also important considerations.
If you are just starting out with sublimation or toner heat transfer, you may be curious what style of heat press is right for you. Some of the factors to consider before purchasing your swing-away or clamshell heat press are listed below.
Clamshell Heat Press:
Swing-Away Heat Press:
Once you've sublimated an item, you can't undo the press, but there are lots of ways to avoid ghosting for clear prints on the first try! Ghosting refers to an image that is blurry, has a shadow, or looks like a ghost of the image is left behind after a press. Ghosting is a result of the transfer shifting during the sublimation process or when removing your transfer. To reduce shifting of the blank, we recommend using heat tape to keep your item steady.
Browse FAQ's and information for
Browse FAQ's and information by
Browse our
Our free resources are here to help you create confidently! You’ll find everything from laser engraving ideas to sublimation heat press settings in our ever-expanding collection of blogs, how-to-videos, free artwork downloads, tech tips, and templates.
In addition to high-quality blanks, supplies, and equipment, our free resources help you work faster, learn new techniques, and take your personalization or signage business to the next level! Whether you’re looking for tips and tricks for sublimation, laser engraving, rotary engraving, UV printing, DTF, or DTG - you’ve come to the right place!
Our video library offers creators and sign-makers quick tutorials, expert product demonstrations, and creative inspiration for laser engraving and more. Explore topics like:
New videos are uploaded regularly to keep up with new trends and technologies.
Design with confidence using our downloadable product templates and material-specific tech tips. Each resource includes:
Perfect for sublimation blanks, laserable materials, UV-print ready items, and more, these free downloads help reduce waste and improve production speed.
Looking for creative ideas for your laser engraver, UV-printer, or more? Our blog and featured project pages give you real-world applications and tips for:
Additional resources include:
Follow Us On
Social Media
for the latest trending products,
inspiration, tips, tricks and more!
@johnsonplasticsplus