ChecklistBefore you get started, prep your work station with the following:- Bare substrate & printed transfer - Heat tape, cleaning cloth & all-purpose cleaner- Heat gloves, scissors & blowout paperDownload & print our checklist and instructions below!
Step 1First, turn on your heat press and set the temperature to 385°F / 195°C (temperatures based on prints made with small desktop sublimation printers). Strong pressure is recommended (settings may vary based on equipment).Add a sheet of protection paper (blowout paper) on the bottom plate of the heat press.
Step 2Clean the surface with all-purpose cleaner, a cloth, and compressed air.
Step 3You should have two images printed on your transfer paper.Cut the corners of one of the transfers about 5mm away from the edge of the image in order to have plenty of space to tape the first transfer to the second.
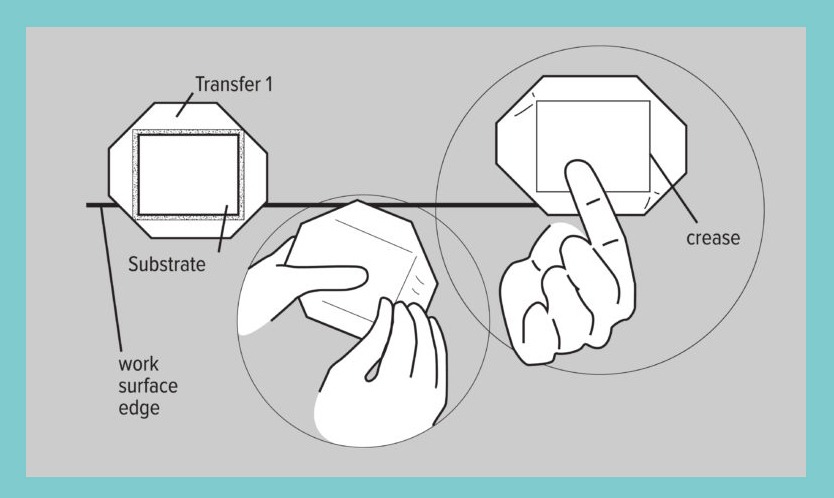
Step 4Next, line up and center one side of the blank bag tag to the transfer with the cut corners.Pick up the bag tag and crease the transfer paper along the edges of the bag tag so it will stay lined up with the outline of the image or graphic.
Step 5Make sure the transfer is at the edge of the table, and hold the first transfer in place by tightly gripping the bag tag and transfer with your thumb and finger.
Step 6Line it up with the second transfer, keeping the first side of the transfer slightly peeled back, so you can see where you’re placing the key chain.
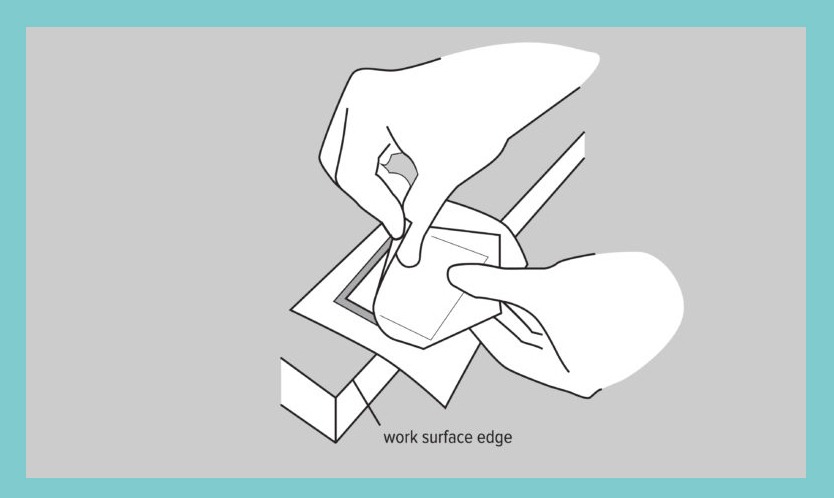
Step 7Once secured on the second transfer, peel back the edges of the first to double check that all the sides are even. Make small adjustments as needed.
Step 8Next, place four pieces of tape on the corners to secure the transfers to the keychain. Avoid placing the tape on the key chain outline. Carefully slide the prepared key chain off the table and place in the heat press.
Step 9Add everything in the center of the bottom plate of the heat press. Be sure that your printed transfer is face-down on the bottom plate.Add a layer of blowout paper or Endura on top of your printed transfer and set the correct temperature & set the time for 1:00-1:10 seconds.Close the heat press so the sublimation process starts. Repeat on the other side.
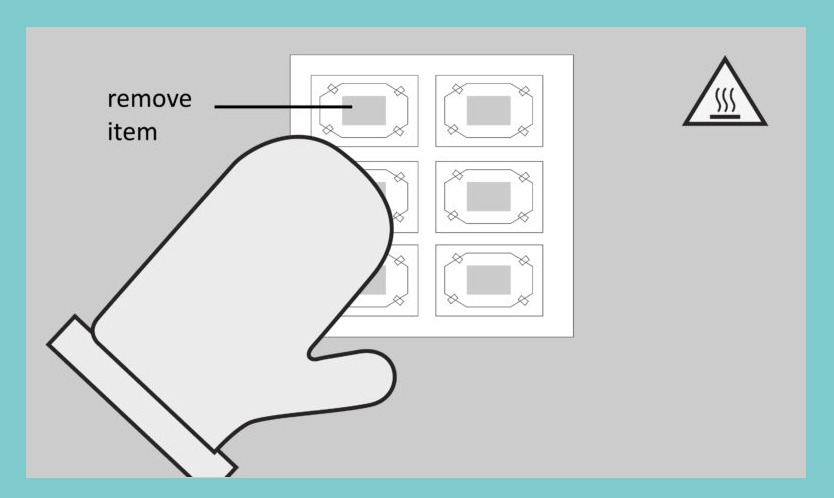
Step 10When the sublimation process stops, remove immediately the transfer paper off both sides of the key chain and allow the product to cool down. Attention: the item will be hot, so wear protective heat gloves.
Step 11Allow the key chain to cool for a few minutes. After the keychain has cooled, attach the key rings using provided hardware and enjoy!