
Your Cart Total
{{price(cart.total || cart.subtotal_with_discount)}}
Add {{price(remainder)}} to qualify for free shipping*
You qualify for free shipping!*
Some items in your cart do not
qualify for free shipping.
A jig is a template created to help with alignment of items you want to engrave in a laser. Jigs can make the engraving process move more efficiently and help reduce misalignment issues.
One benefit of using a jig is that you can engrave multiple pieces at once and save time. If you’re engraving smaller items in your laser, such as a coaster or a keychain, you can create a jig that will hold multiples of the same item in place in your laser at the same time. This means that you don’t have to move your artwork around after every laser engraving pass, and it keeps the items from shifting in the laser.
Engraving certain items that don’t lay flat in the laser may also require a jig. Items such as drinkware with a tapered end, cup sleeves, and other items may need a piece of cut sheet material to help it lay the correct way.
There are three primary styles of jigs that are typically used with their lasers:
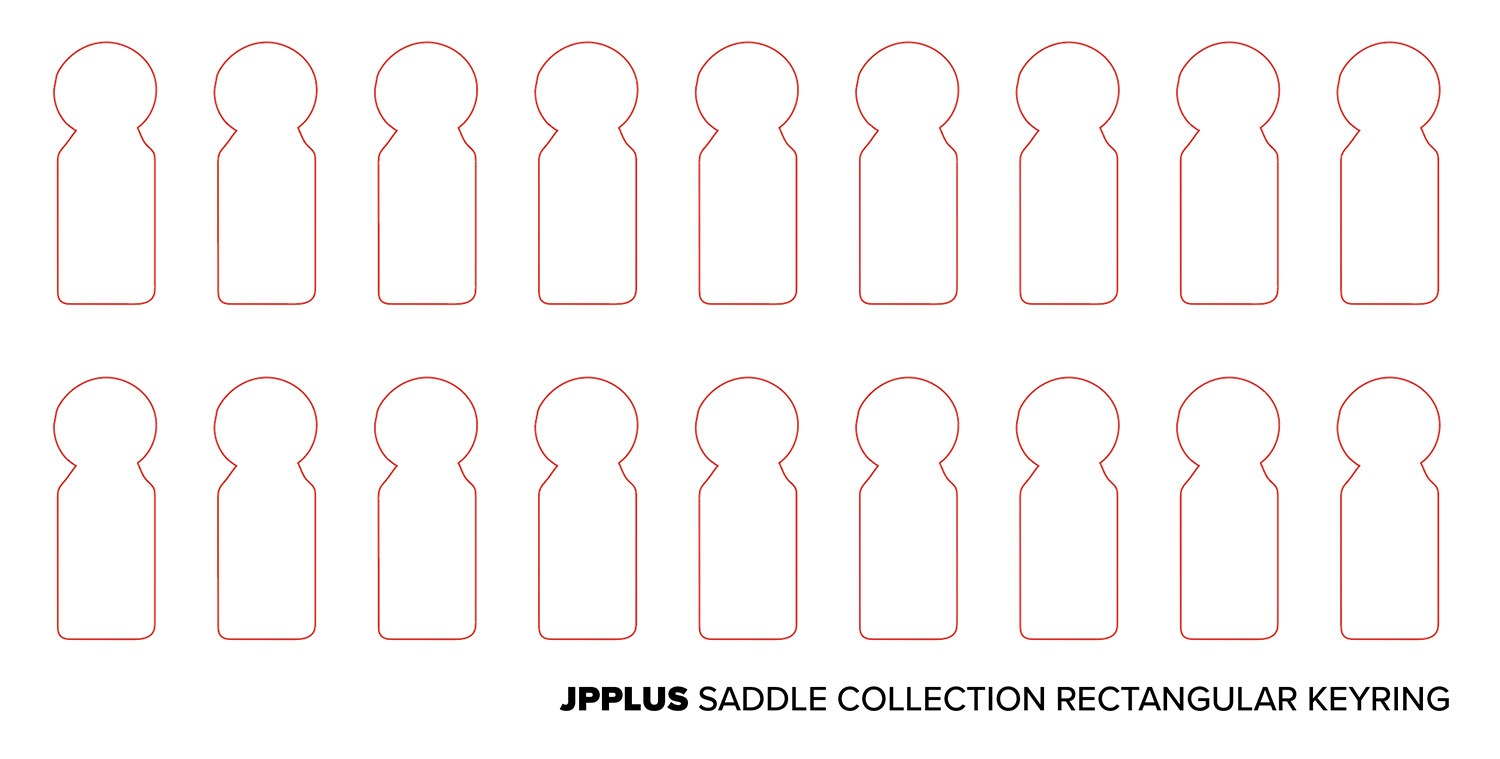
1. Template for placing blanks on a laser bed when engraving multiples of the same items.
2. Template used for letter layout post-engraving.
3. Cut material designed to help items lay flat in the laser.
Create in your design software
1. Create an outline of your blank in your design software with dimensions just slightly bigger than your blank. If you’re using a template downloaded from the JPPlus website, you can find the exact dimensions of the item in the details tab of the product page. Remember, you’ll want the jig area to be just a little larger than the blank itself: large enough that it will be easy to take the blanks in and out of the jig quickly, but not so large that the item will shift.
2. Duplicate the shape of your blank in your graphic design software as many times as you can fit in the overall size of your jig.
Cut your jig
1. Before cutting, you’ll want to determine the best material for your jig. For high durability, 1/8” thick acrylic sheet is best to use for your jig.
2. Pick the placement for your jig in your laser. You’ll want to put your jig in the same spot every time so you can keep the same alignment in your engraving software for every pass.
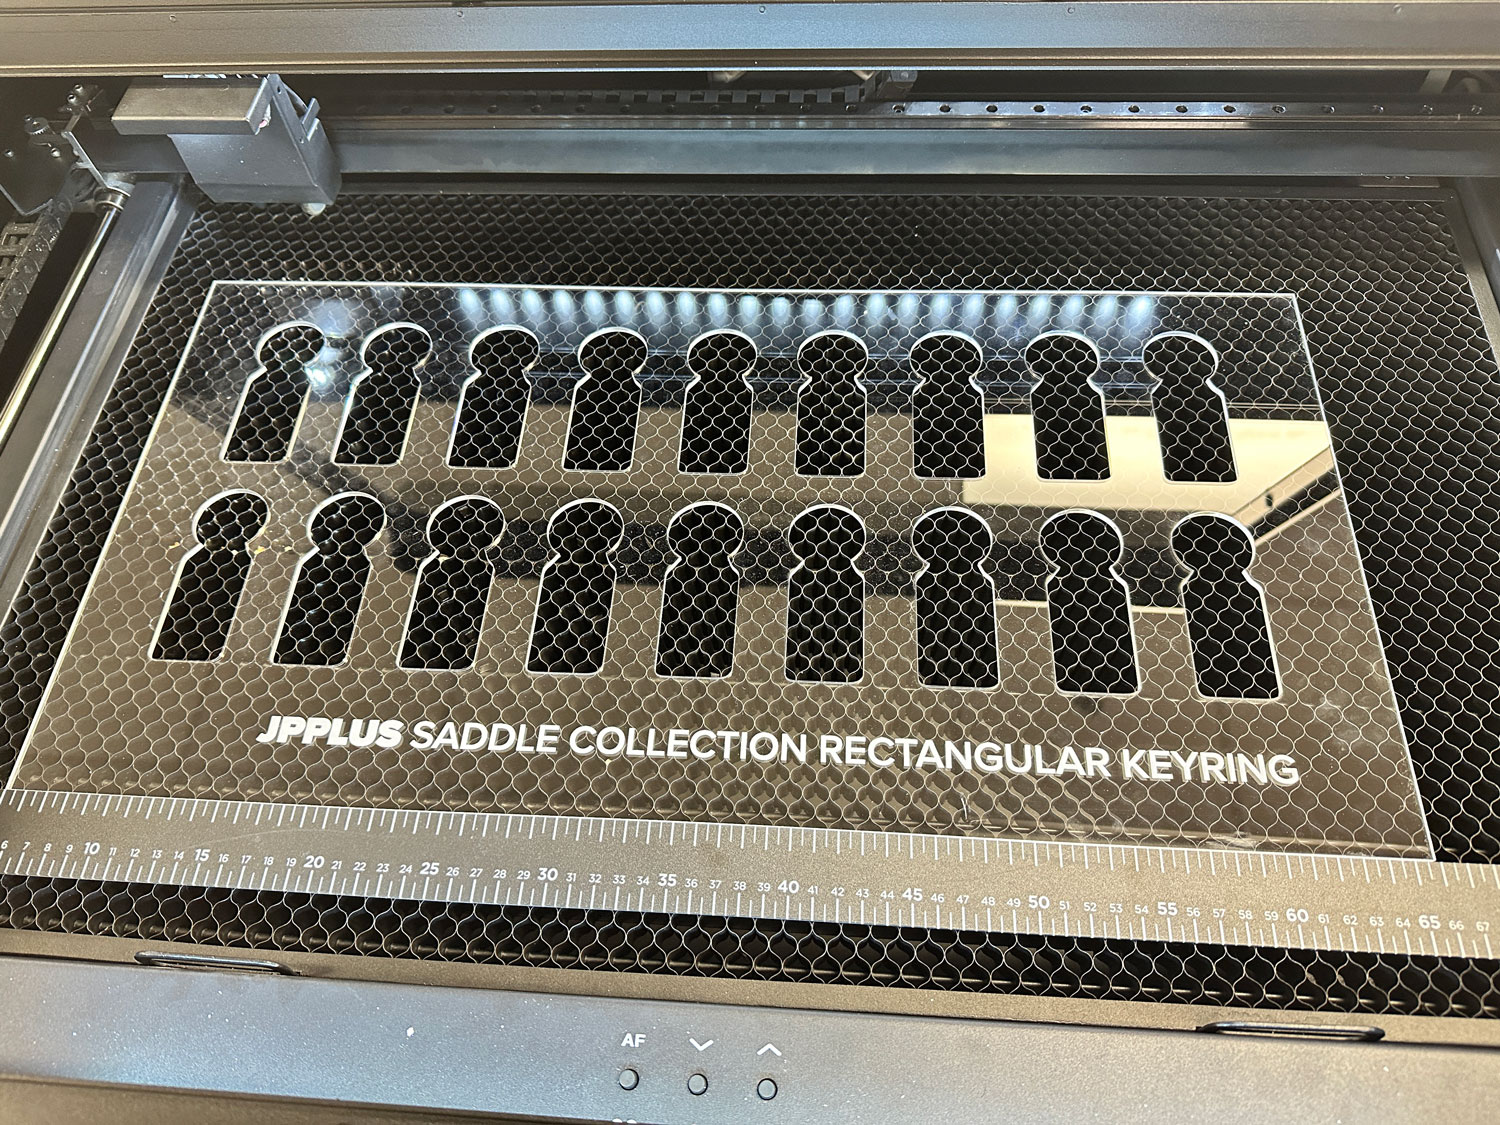
3. Once your sheet is in the laser, you can send your jig template to the laser and cut.
4. After the jig is cut by the laser, remove the cut spots on the sheet where your blanks will be placed.
Using your jig for your engraving blanks
1. Import your designs to your laser software and copy them over your jig template. Once your design is imported, you can move it into the outline of the blanks where you want the design.
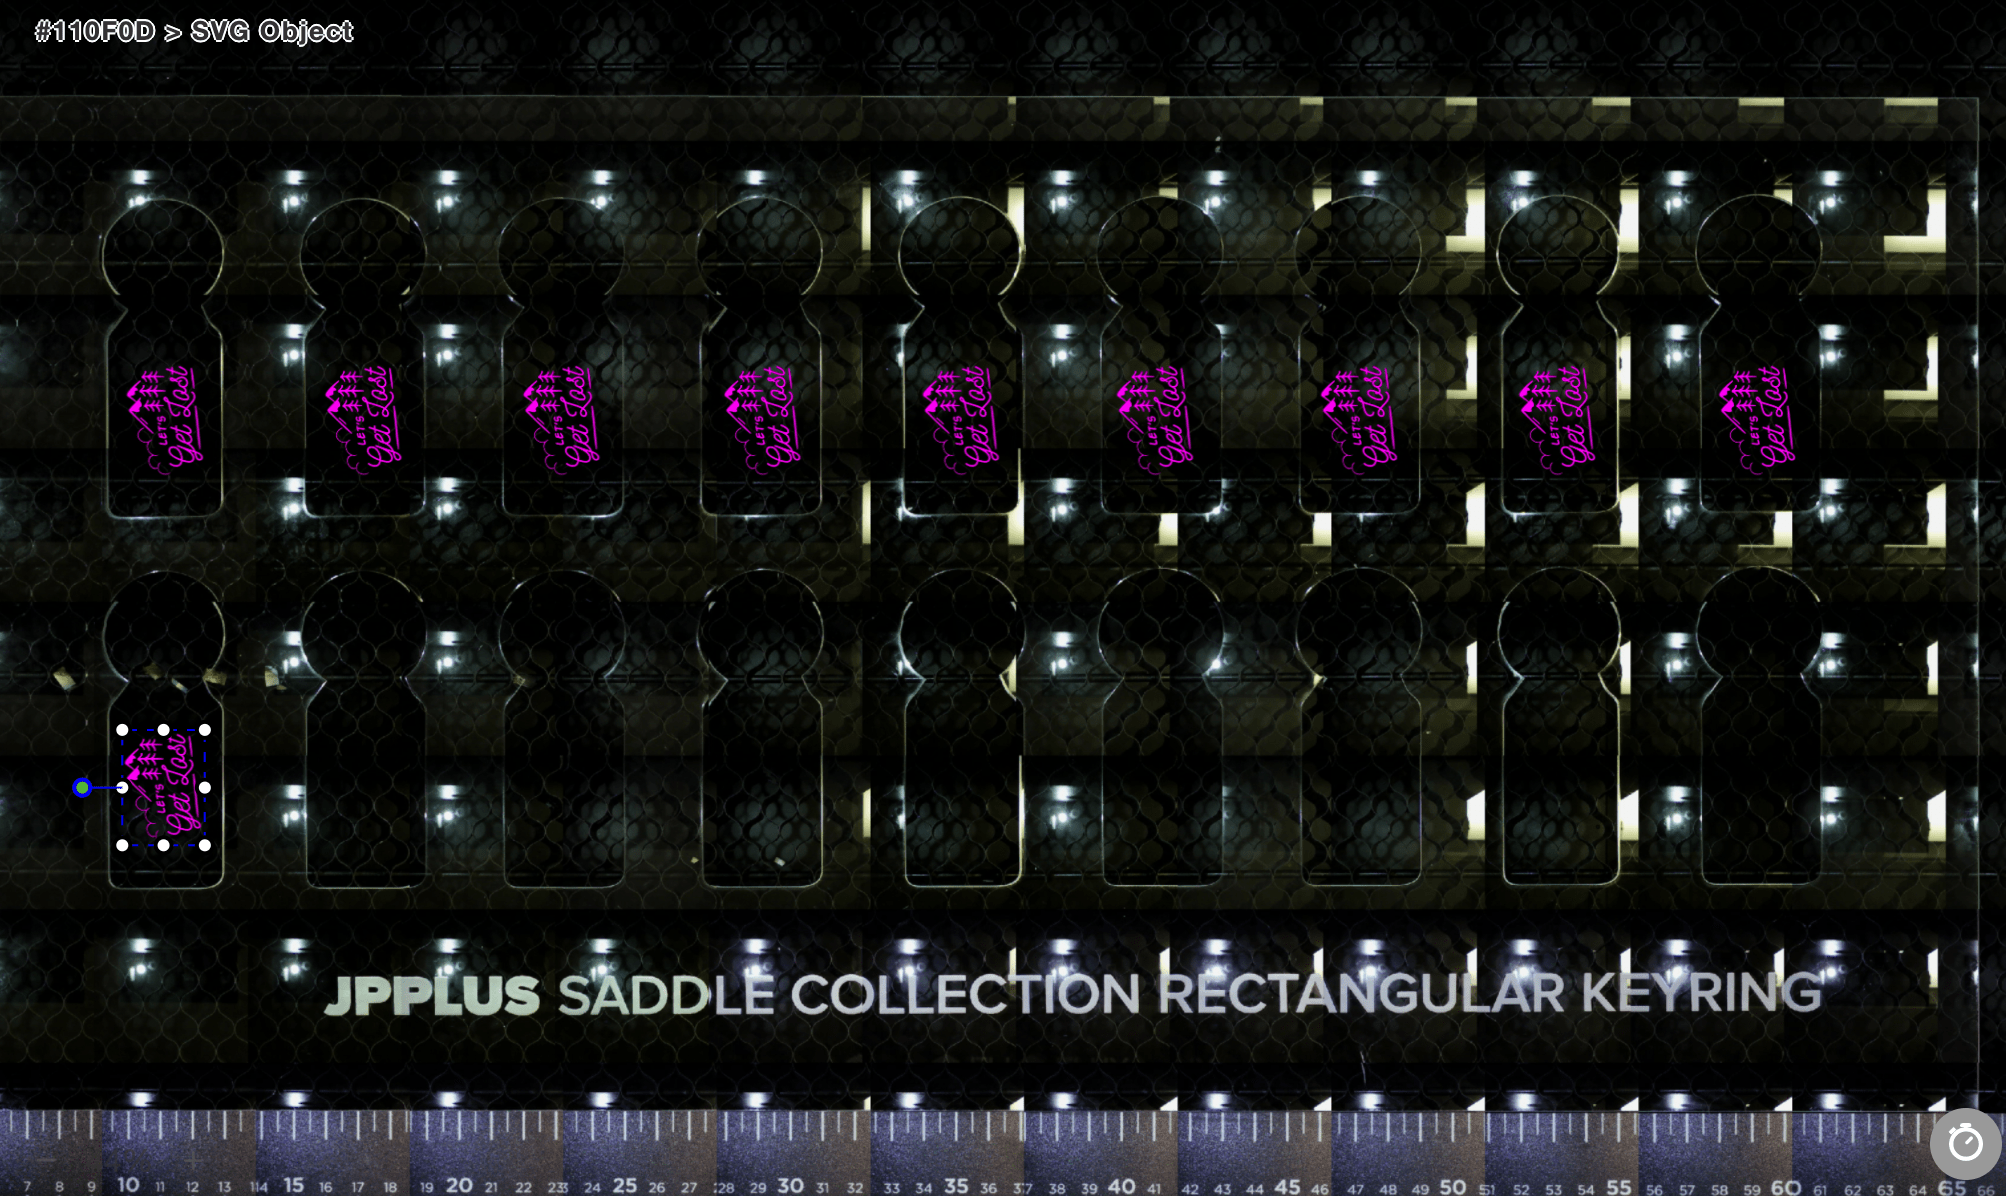
2. Place your jig into the laser and then place your blanks into their designated spaces
3. Remove your jig template design from the laser software and start cutting. You want to be sure to remove the template itself from the design software so the laser doesn’t accidentally re-cut the jig while lasering the items the jig is holding.

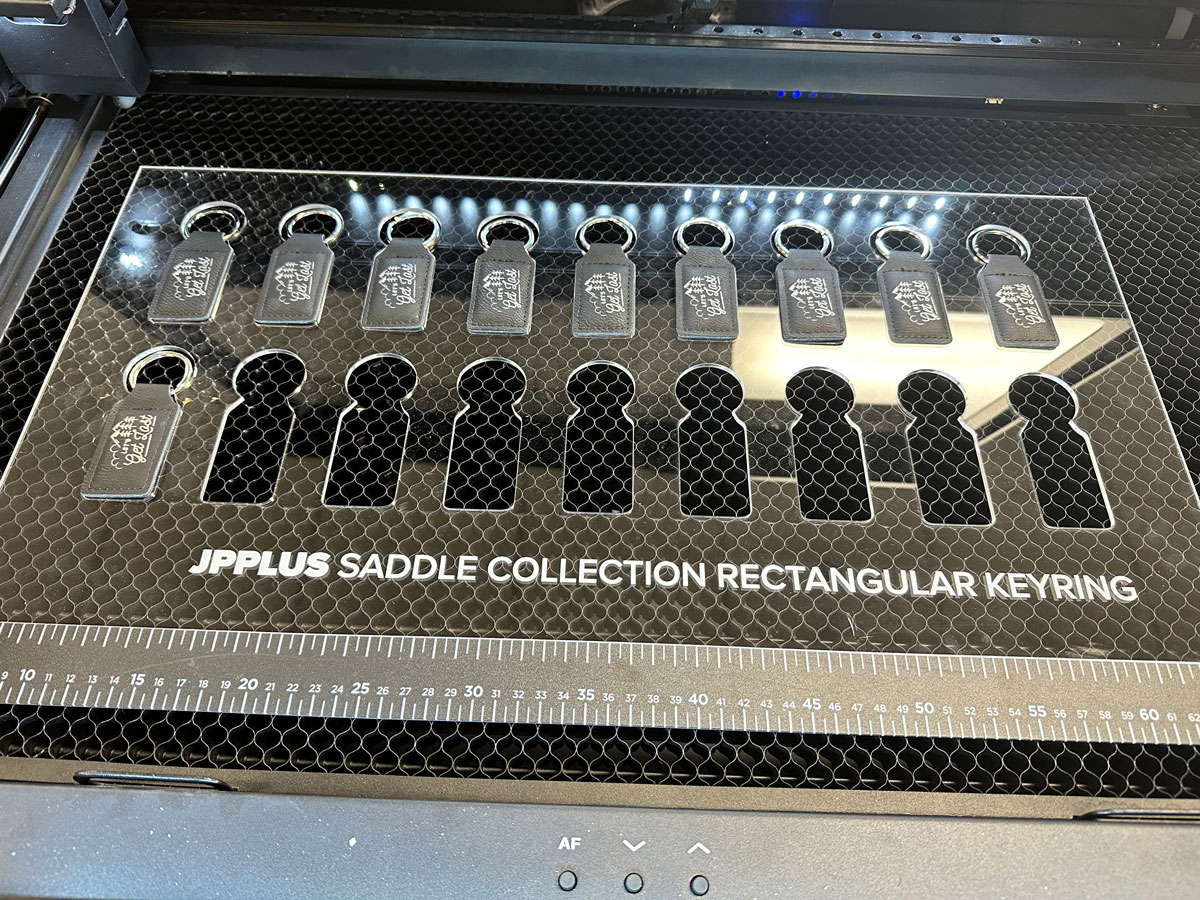
4. Once the laser has engraved your pieces, you can take them out and add new blanks to the jig spaces. If you want a new design on the blanks, you can remove the old file and place the new design into the jig template on your laser software.
1. Open your design program and create a new document. Create an outline with the dimensions of your blank.
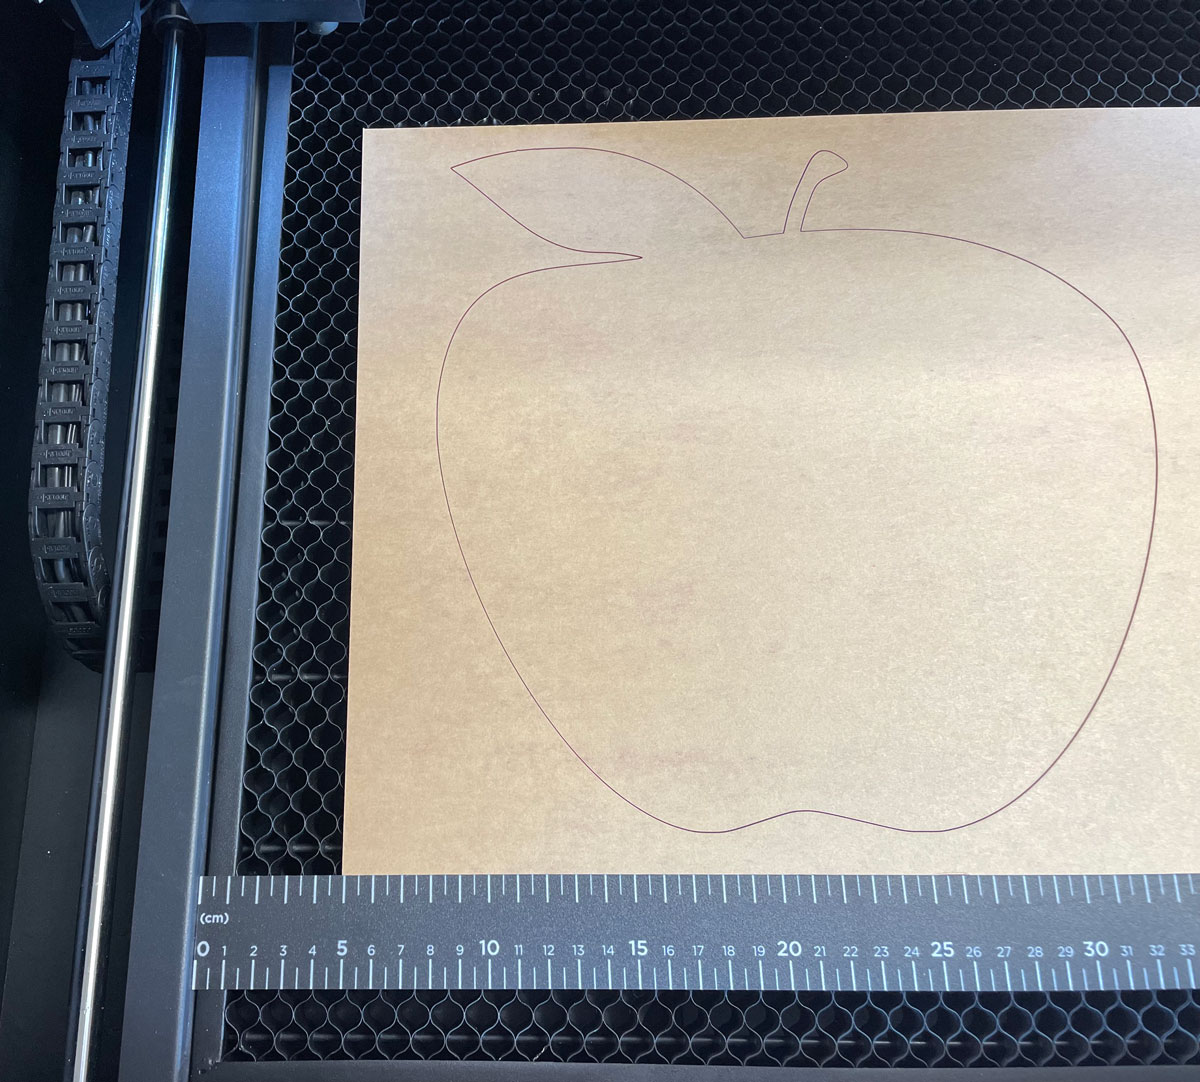
2. Add your artwork inside of the outline where you want the letters to go on your blank.
3. Before cutting, you’ll want to determine your jig material. For high durability, 1/8” thick acrylic sheet is best to use for your jig base.
4. Cut your jig and letters. For easier placement after cutting, it’s recommended that you apply adhesive to the back of this piece before fabricating.
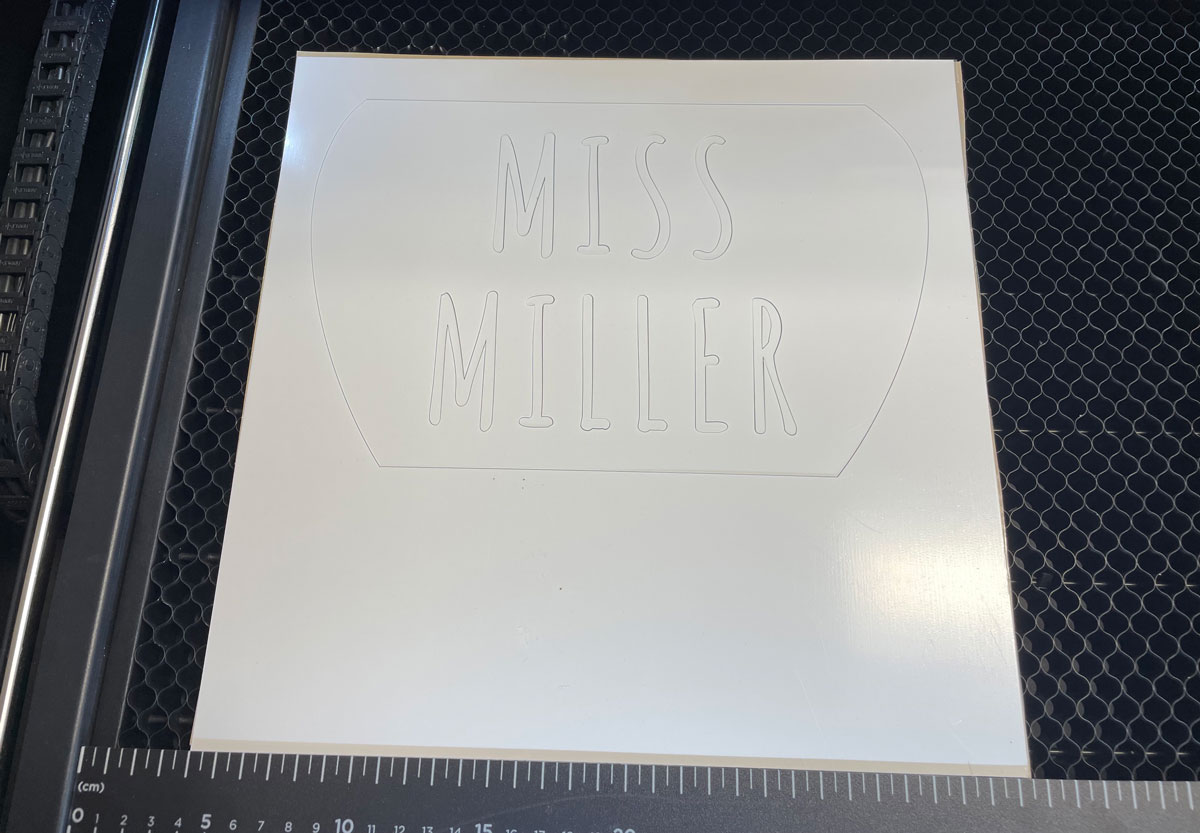
5. Once your piece is finished, you can remove the letters. The remaining piece is now your jig for placing the letters correctly on your blank backer piece.
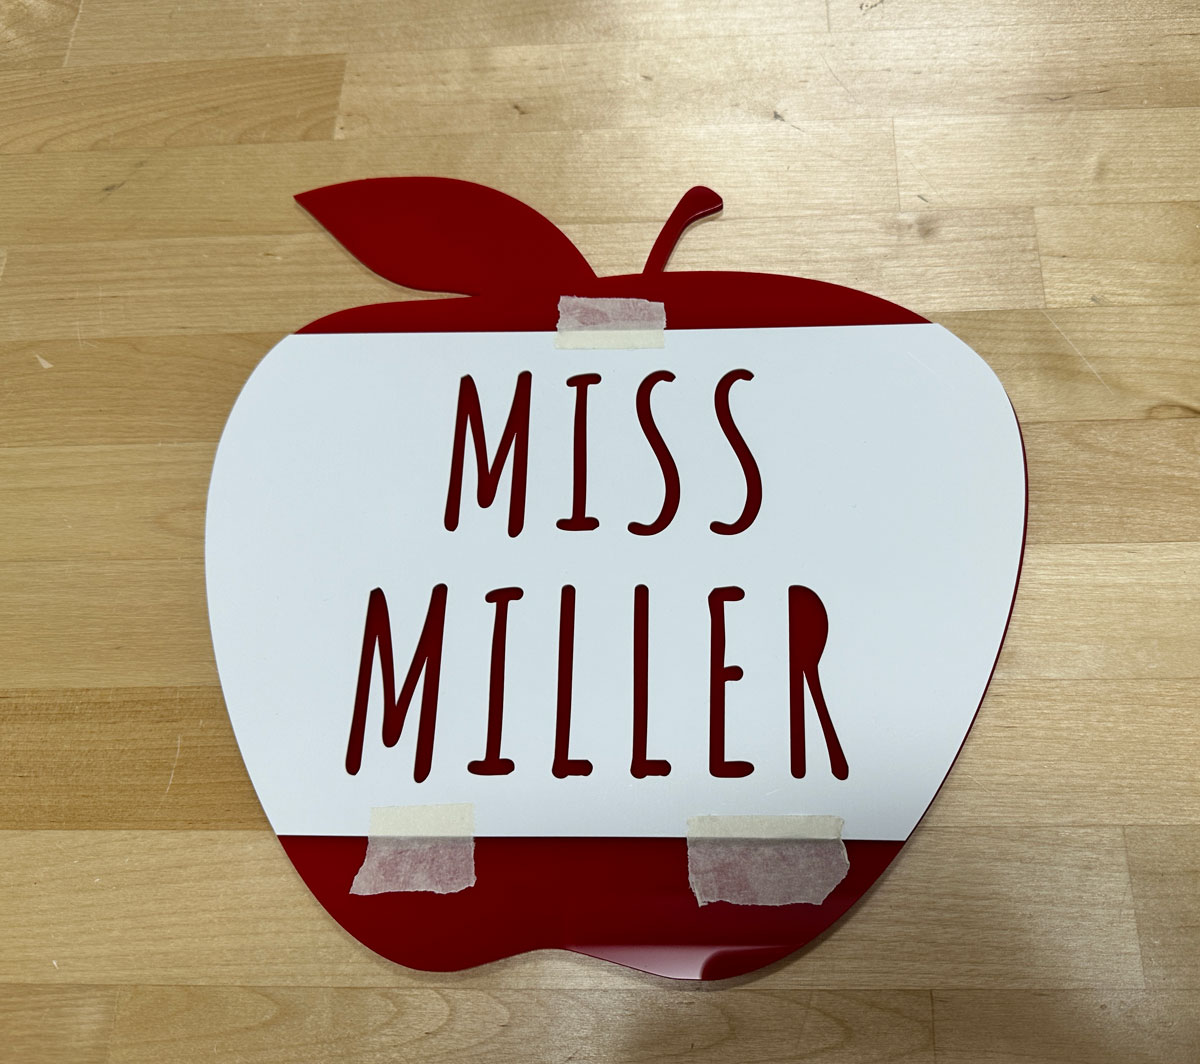
6. Tape the jig on top of your blank so they’re aligned.
7. Remove the backing for the adhesive on the back of the letters and push them into the correct spaces of the jig.
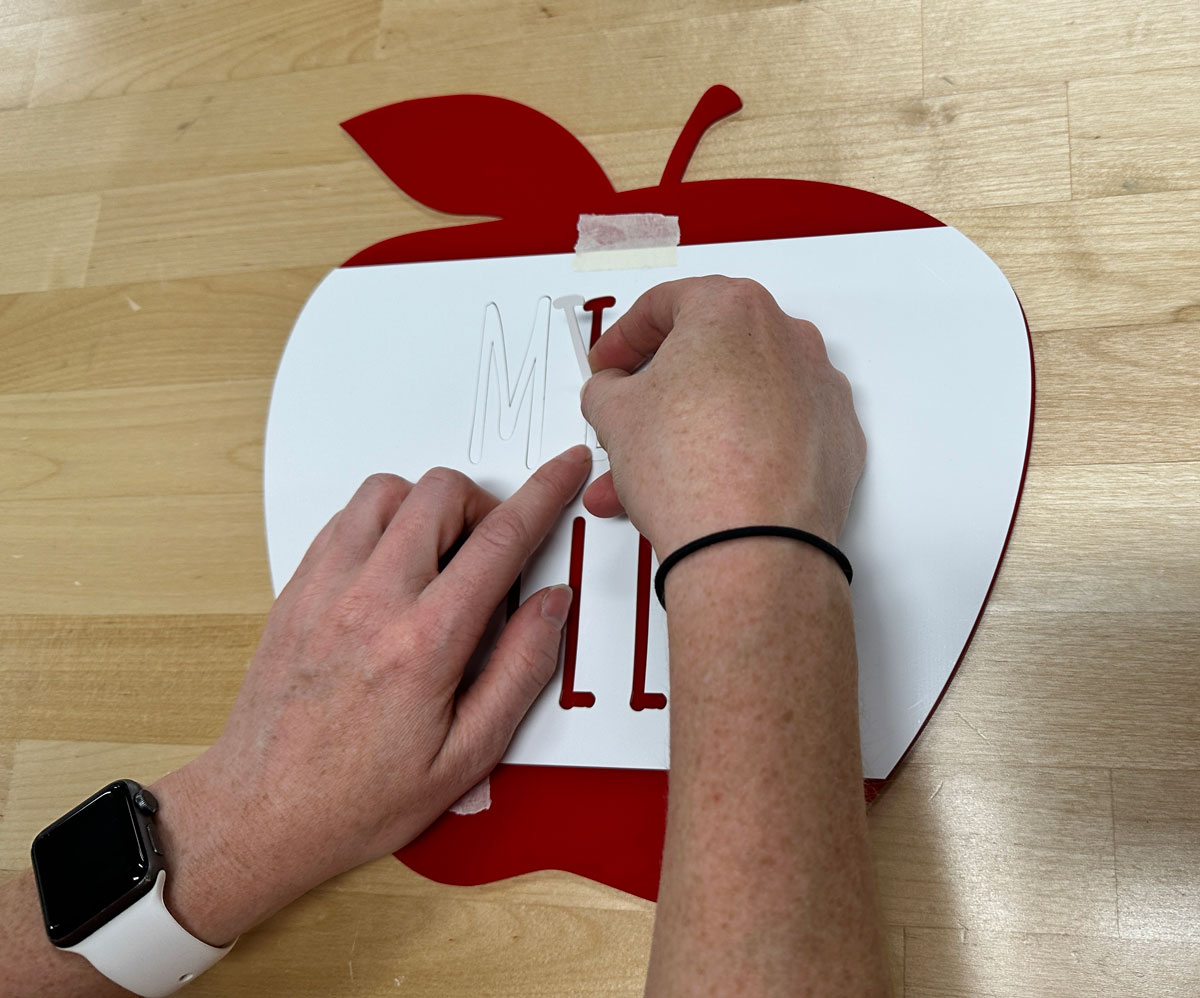
8. Take the jig off of the piece.
1. Determine what size you need the jig to be by measuring your blank. For example, if you are engraving a cup sleeve, you will want to measure the item when it’s completely flat as it would sit in the laser.
2. Determine what material you want your jig to be made of. 1/8” thick acrylic is recommended.
3. Duplicate the shape of your blank in your graphic design software as many times as you can fit in the overall size of your jig.
4. Once your sheet is cut, remove the jigs. Take them out and put your blanks over the jigs. Then, you can add the blanks back to the open spaces of the cut sheet in the laser.
5. Add your artwork to the laser software, and start the engraving process.
6. Once your piece is engraved, you can take the jig out and you should be left with your personalized item.
Watch this video for more insight on how to create this type of jig template!
Now you should have a jig template that will help your engraving process go swiftly. These jigs are great for coasters, keychains, pens, cup sleeves, and so much more! If you would like to create a jig for drinkware such as our Simply Engraving Tumblers, you can find a jig template file ready to be imported into your laser software in the downloads tab on the product page.