
Your Cart Total
{{price(cart.subtotal - cart.discount)}}
Add {{price(remainder)}} to qualify for free shipping*
You qualify for free shipping!*
Some items in your cart do not
qualify for free shipping.
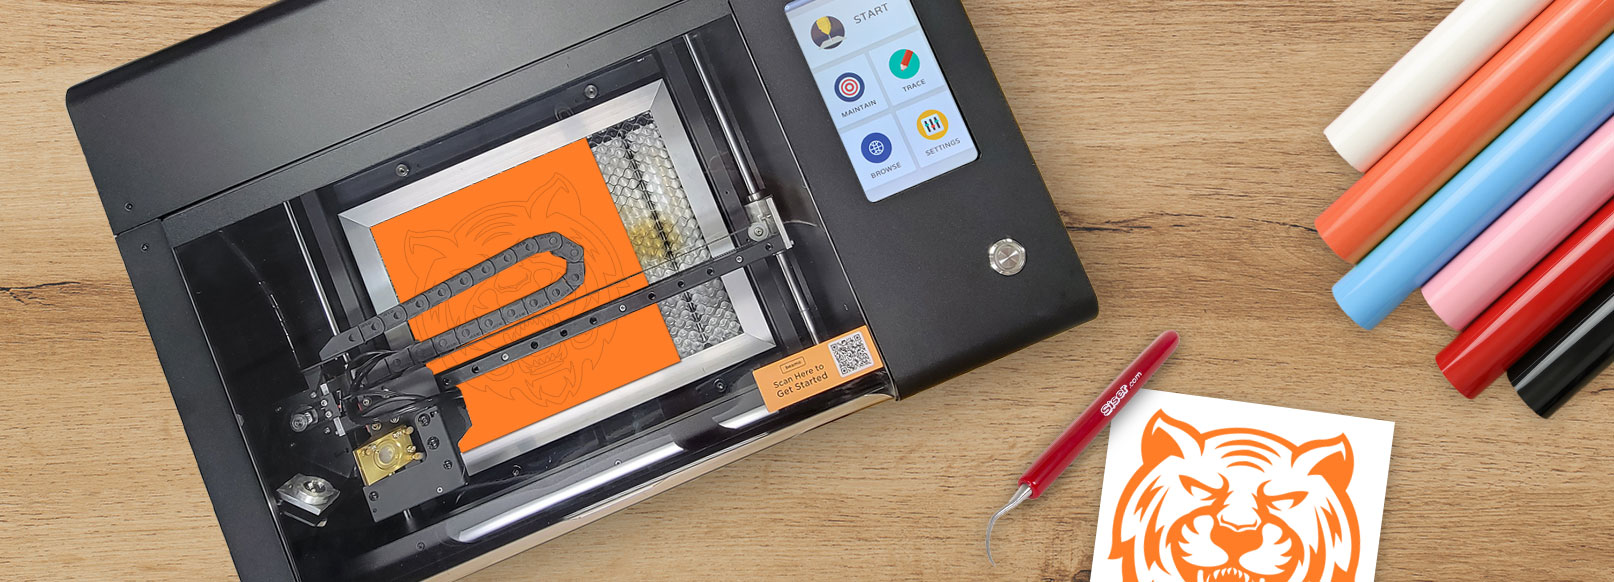
Using a laser to cut your Siser® HTV (Heat Transfer Vinyl) material is a quick and easy way to achieve precise cuts if you don’t have a designated vinyl cutter available. Cutting your HTV with a laser instead of a professional vinyl cutter also helps to clearly show the cut marks on your HTV after the lasering process to make weeding easier.
HTV is a great personalization method for apparel and other soft goods because you’re able to personalize almost any kind of dark and light materials. HTV is also known to stretch well with the material it’s transferred to, so customers don’t have to deal with stiff, uncomfortable designs after using HTV.
If you’re using a laser to cut out your HTV designs, there are some things you’ll want to keep in mind before you start cutting. This guide goes through the steps you’ll need to take before cutting your HTV with a laser.
Although there are many heat transfer materials that are safe to use in a laser, it’s important to check the product description to ensure the material is noted as being “laser safe” by the manufacturer. The Johnson Plastics Plus website and Siser website have laser-friendly icons on the product pages of material that can be confidently used with a laser.
When placing your HTV into the laser bed, ensure that your laser is properly focused and your HTV is aligned. Depending on your laser, you may have to focus it manually by raising and lowering the laser bed or laser lens. You can also place the HTV on a cutting mat to ensure it’s stable during the lasering process and no small pieces fall through the bed.
HTV already comes with adhesive masking and is cut on the back side of the HTV, so you don’t need to worry about the laser damaging the HTV during the cutting process. Since the HTV that will be going on your substrate won’t be damaged by any scorching or smoke, there’s no need to apply an additional layer of masking onto your HTV.
When cutting out your design on HTV, the cuts will be made on the backside of the sheet. Because of this, you’ll need to mirror your artwork in your laser’s software to ensure that your artwork is the correct orientation when you transfer to your substrate.

When using a laser, it’s important to have the correct power, speed, and other settings based on the material you’re cutting. The speed and power you need to set your laser at will vary depending on your laser's wattage and the HTV's thickness. You may be able to find the correct settings for your laser online, but it may take some of your own experimentation to find the right power and speed.
If you don’t know the exact settings for your laser before starting, you’ll want to do some test cuts on your HTV. Perform test cuts on a small piece of the HTV or in the corner of the sheet to ensure you don’t lose more of your material than you need to. Once you find the correct settings, you can name and save your settings in your laser software for easy access and future use.
Laser cutting can produce occasional smoke and fumes, so it’s important to have the proper ventilation your laser requires. Before starting your laser process, ensure that your laser's ventilation or exhaust systems are turned on and ready to remove any harmful fumes from your work area.
Cutting your Siser® HTV with a laser is a fast and easy way to get precise, accurate cuts on your design. It’s important to follow all of Siser®'s steps regarding laser cutting their HTV. You may also need to experiment and practice with the laser settings to get the best possible results for your designs. Make your personalization life easier and start cutting your HTV on your laser today!